How to Take Blog Photos With Your Phone: A Simple Window-Light Setup

Your post is written and now you need a photo. The stock site has the same laptop-and-latte shot everyone uses, and the AI image looks right until someone notices the product has the wrong number of buttons.
Here is the short answer: you can take good blog photos with your phone if you control three things — light, background, and stability. A window, two sheets of white board, and a phone held perfectly still will beat a new phone in a dark kitchen every time.
This guide shows you the exact setup, the camera habits that matter, and how to get those photos onto WordPress without slowing your site down.
Table of Contents
Why Your Own Photos Matter More in 2026
Original photos are not a ranking trick. They matter because they show readers — and search engines trying to understand your page — that you actually did the thing you are writing about.
Google says this directly for review content. Its guidance on writing high-quality reviews (last updated December 2025) recommends providing evidence such as visuals, audio, or links from your own experience with what you are reviewing.
It is the idea behind building first-hand experience into your posts with E-E-A-T. A photo of the product on your desk is proof a stock image can never provide.
There are practical benefits too:
- Readers trust what they can see. A real photo of the box contents answers “what do I actually get?” faster than a paragraph.
- Your images are unique. Nobody else has your exact shot.
- You control the angle. You can photograph the detail your readers ask about, not just the hero angle the brand chose.
One limitation: original photos help most on reviews, tutorials, and “how I did it” posts. On opinion or news posts, a clean illustrative image is fine.
How to Take Blog Photos With Your Phone: The 5-Minute Window Setup
This is the setup to master first. It costs almost nothing and works for products, books, food, desks, and flat lays.
Step 1: Find the right window
You want bright light that is not direct sunlight. A north-facing window (in the Northern Hemisphere), an overcast day, or any window the sun is not shining straight through will give you soft, even light.
If the sun is streaming in and casting hard shadows, tape a sheet of baking parchment or a thin white curtain over the window. That instantly turns harsh light into soft light.
Step 2: Build a simple backdrop
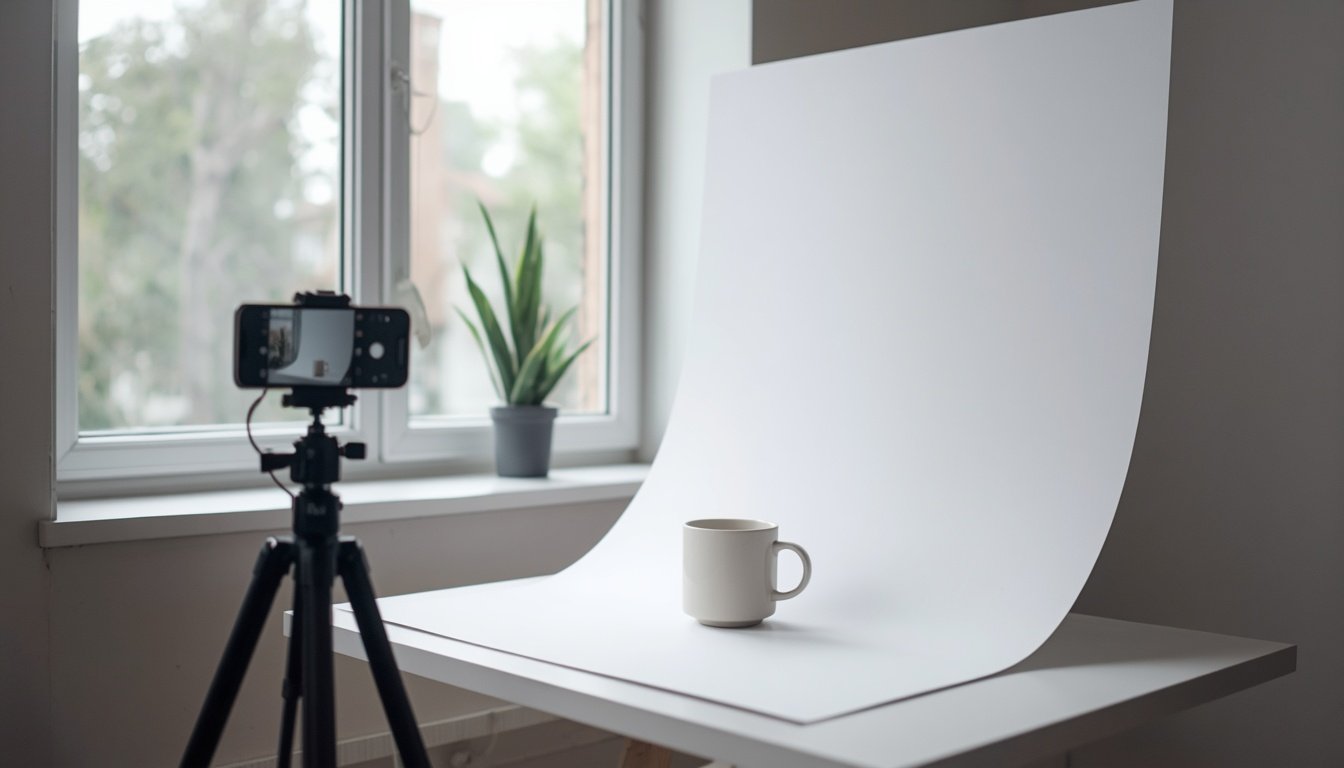
Put a table beside the window so light hits your subject from the side. Lean one white board against something behind the subject and lay another flat underneath, or curve a single poster board from the wall down onto the table. The curve hides the line where table meets wall.
Side light is the key. Light from behind you flattens the product; light from behind the product turns it into a silhouette.

Step 3: Fill the shadow side
Look at the side of the product facing away from the window. It will be darker. Hold or prop a second white board on that side, just out of frame, to bounce window light back into the shadows. Move it closer for more fill, farther for more drama.
Step 4: Turn off the room lights
Ceiling bulbs are usually warmer than daylight. Mixing them gives photos that look orange on one side and blue on the other — a common reason phone photos look “off.”
Step 5: Steady the phone and shoot
Wipe the lens first — pocket lint and fingerprints cause more blurry, hazy shots than any camera setting. Then rest the phone on a tripod or a stack of books, and use a remote shutter or the self-timer so tapping the screen doesn’t shake the shot.
This video from the Transfer Express YouTube channel demonstrates nearly the same setup: window light, a poster board backdrop, foam board as a fill card, and tap-to-set exposure. It targets online sellers, but every step applies to blog product shots (the closing t-shirt mockup segment is optional).
Phone Camera Habits That Make the Biggest Difference
You don’t need manual mode or a pro camera app. These habits matter far more.
Tap to focus, then adjust exposure
Tap the most important part of the subject — the logo, the label, the screen. Most phone camera apps then show a brightness slider beside the focus point. Nudge it down slightly if white areas look blown out; nudge it up if the product looks muddy.
Turn on the grid
Both iPhone and Android camera apps offer grid lines in their camera settings. Use them to keep horizons and table edges straight, and to place the subject slightly off-center when you want room for a headline or caption.
Use the 2x lens for products, not 1x
Wide lenses stretch objects close to the camera, which makes boxes and gadgets look distorted. Stepping back and using your phone’s telephoto or 2x setting gives more natural proportions. Without an optical telephoto, step back and crop later rather than using heavy digital zoom.
Window Light vs. Lamp vs. LED Panel
Window light is the best free option, but it changes through the day and disappears at night. Here is how the common choices compare:
| Light source | Cost | Consistency | Best for | Main drawback |
|---|---|---|---|---|
| Window (diffused) | Free | Changes with weather and time | Products, food, flat lays | Only works in daylight |
| Household lamp | Free | Consistent | Quick reference shots | Warm color cast, harsh shadows |
| Small LED panel | Low | Very consistent | Evening shoots, screen-free desks | Needs diffusion to look soft |
| Ring light | Low | Consistent | Faces and talking-head video | Ring-shaped reflections on shiny products |
Our recommendation: start with the window. Buy a light only once you notice you keep skipping photos because it’s dark when you write.
A Shot List for Product and Affiliate Posts
Knowing what to shoot is half the battle. For product reviews and affiliate posts, start with:
- The product in use, in a real setting (your desk, kitchen, bag)
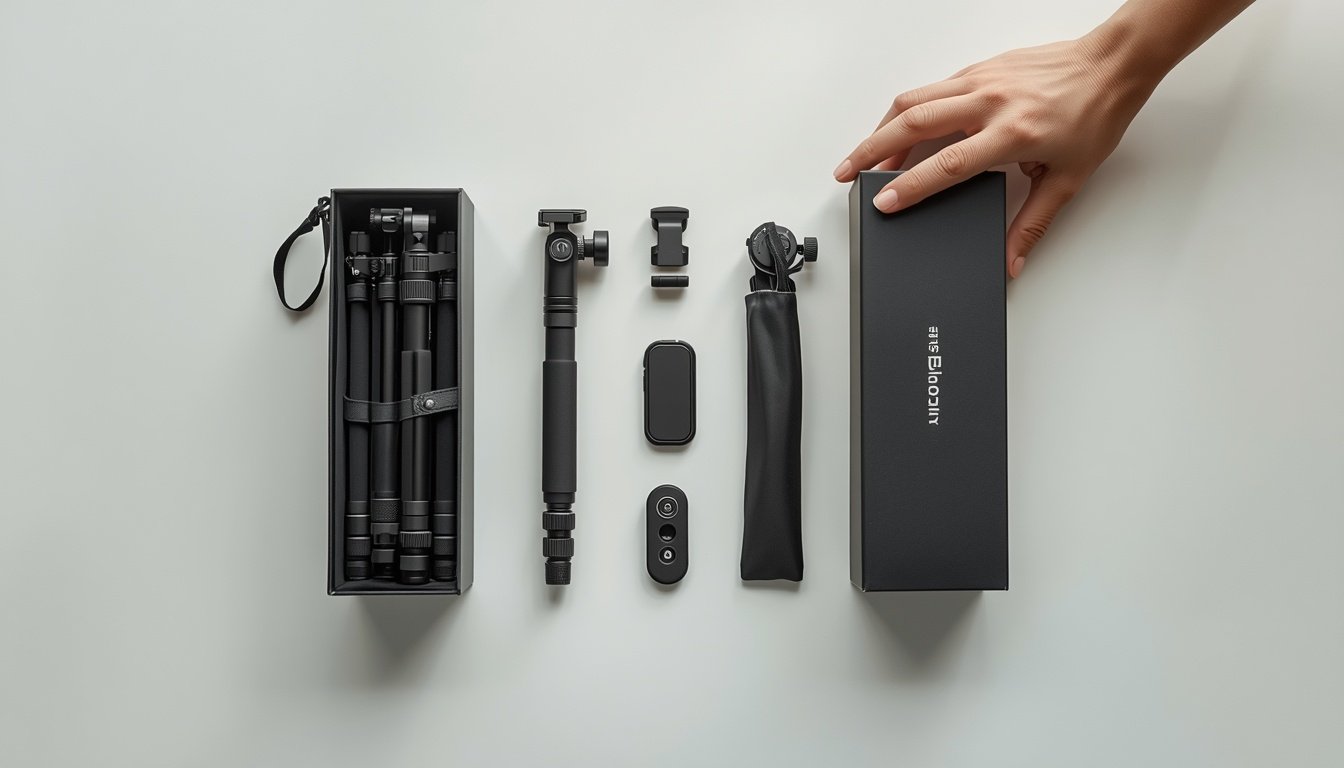
- What’s in the box, laid out flat
- The detail readers ask about most (ports, stitching, the size compared with your hand)
- Any flaw or limitation you mention in the text
That last shot is the one most bloggers skip, and it is often the most persuasive. Showing a downside is exactly what separates honest reviews from thin ones — a theme we cover in our guide to affiliate marketing for bloggers who want content that converts cleanly.
If you plan content in advance, add a photo session to your schedule. Shooting images for four posts in one sitting takes far less time than setting up four separate times — the same logic behind batching a month of blog content in one weekend.
Useful Gear (Only If You Need It)
Disclosure: This section contains Amazon affiliate links. As an Amazon Associate I earn from qualifying purchases. If you buy through these links, Daily Net Blog may earn a commission at no extra cost to you. We have not personally tested these specific items; they are selected based on their listed features and how well they fit the setup above.
Everything above works with things you already own. These items solve specific problems once you shoot regularly.
1. UCreate White Foam Board (20″ x 30″, 10 sheets)
What it’s for: Your backdrop and your fill card in one. Matte white board is the backbone of the window setup.
Who it suits: Anyone starting out. Keep one clean sheet for backgrounds and cut others into bounce cards.
Consider: Foam board dents and marks easily, so expect to replace your background sheet now and then.
View UCreate Foam Board on Amazon
2. NEEWER 5-in-1 Collapsible Reflector (24″ x 36″)
What it’s for: A foldable reflector with white, silver, gold, black, and translucent surfaces. The translucent disc can diffuse harsh window light; the others bounce or block light.
Who it suits: Bloggers who also shoot outdoors or in different rooms and need something portable.
Consider: For tabletop product shots, a white board does the same job as the white surface. The reflector earns its place when you need diffusion or portability.
View NEEWER 5-in-1 Reflector on Amazon
3. UBeesize 92″ Phone Tripod With Gooseneck and Remote
What it’s for: A tall phone tripod with a 16.5-inch flexible gooseneck and a Bluetooth remote shutter. The gooseneck lets you point the phone straight down for flat lays.
Who it suits: Bloggers who shoot overhead flat lays, step-by-step tutorials, or want identical angles across a series of photos.
Consider: Fully extended with the phone hanging over the table, check stability before you walk away. If you only shoot straight-on product photos, a small tabletop tripod is enough.
View UBeesize Overhead Tripod on Amazon
4. NEEWER Basics BP66 LED Light Panel Kit
What it’s for: A small, USB-powered bi-color LED panel (3200K–5600K) on a short adjustable stand, with a diffusion filter. It gives you consistent light when the window can’t.
Who it suits: Bloggers who shoot in the evening or want identical lighting across a series.
Consider: It’s a small light, best for tabletop subjects rather than whole rooms. Set it to the daylight end of its range if any window light is still in the scene to avoid mixed color.
View NEEWER BP66 Light Kit on Amazon
Getting Your Phone Photos Ready for WordPress
A great photo can still hurt your post if it’s a huge file named IMG_4821.HEIC. Before uploading:
Resize and compress
Modern phones capture far more pixels than a blog column displays. Resize to roughly the largest size your theme shows (often 1200–1600 pixels wide), export as JPEG or WebP, and compress. Oversized images are one of the most common causes of slow pages, so if your site already feels sluggish, start with our guide on fixing images and other bottlenecks on a slow Kadence WordPress site.
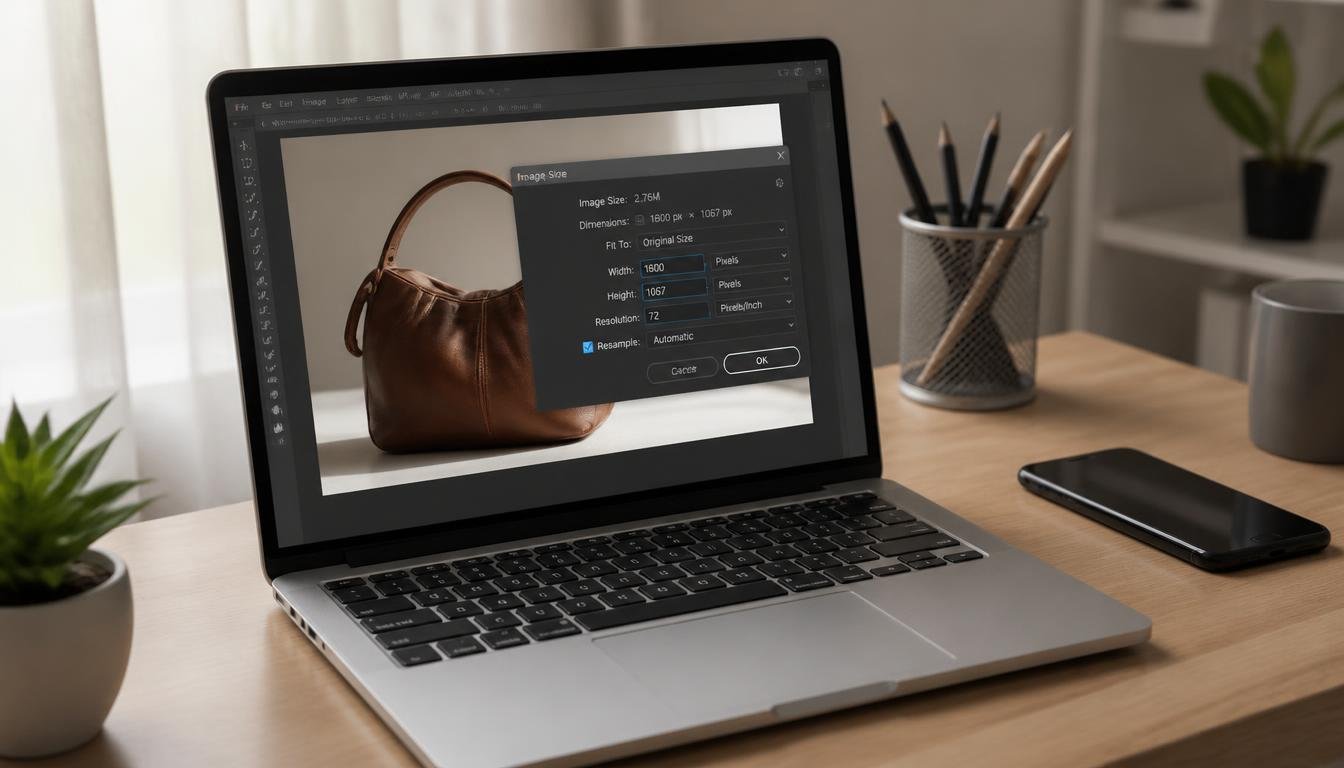
Keep your featured image wide. Google’s Discover documentation (updated March 2026) recommends large images at least 1,200 pixels wide, ideally 16:9, together with the max-image-preview:large setting. Meeting those specs makes an image eligible for a large preview; it does not guarantee Discover traffic.
Name files and write alt text for humans
Rename files before uploading: white-foam-board-window-product-setup.jpg tells Google more than IMG_4821.jpg. Then write alt text that describes what’s in the photo, as you would to someone who can’t see it.
Google’s image SEO best practices (updated March 2026) recommend descriptive filenames, placing images near related text, and useful alt text — and warn against stuffing alt attributes with keywords.
| Weak alt text | Useful alt text |
|---|---|
| blog photos phone blog photography tips | Wireless earbuds case on white foam board beside a window, lit from the left |
| product image | Contents of the box laid out flat: tripod, phone clip, remote, and carry bag |
Start With One Post
Don’t reshoot your whole blog. Pick the one post that matters most — usually your top affiliate review or most-visited tutorial — and replace its stock images with three or four of your own using the window setup.
Once that feels routine, make photos part of your writing process instead of a last-minute scramble. Your phone is already good enough; light, background, and a steady hand do the rest.
Frequently Asked Questions
Is a phone camera good enough for blog photos?
Yes, for most blogs. Recent iPhone and Android phones produce images well above the resolution a blog post displays. Light, background, and stability usually limit quality far more than the camera itself.
What is the best free lighting for blog photos?
A large window with indirect daylight. If direct sun creates hard shadows, diffuse it with baking parchment or a thin white curtain, and turn off room lights to avoid mixed color.
Can I use manufacturer photos in my affiliate posts?
Only if the brand or program explicitly allows it. Many affiliate programs restrict how product images can be used, so check your program’s terms. Your own photos avoid the issue and show real experience with the product.
Should I use AI-generated images instead of taking my own?
AI images can work for illustrative concepts, but they cannot show your real experience with a product. For reviews and tutorials, use your own photos, and clearly label any synthetic image a reader might mistake for documentary evidence.
What size should blog photos be?
Match the largest size your theme displays, often 1,200 to 1,600 pixels wide. For featured images, Google’s Discover documentation recommends at least 1,200 pixels wide, ideally in a 16:9 ratio. Compress files before uploading.
Do original photos help SEO?
They can support it. Google’s review guidance encourages visual evidence of first-hand experience, and unique images can appear in image search. They are not a guaranteed ranking factor, so focus on making them genuinely useful to readers.